Alright, friends – I’m obsessed. Have you seen the viral Krunchoco Cake (كيكة كرنشوكو) from Lazy Cat in the UAE? It has been trending all over social media, and I couldn’t resist giving it a try myself. Since I’m in the US, far far away from Lazy Cat, I decided to recreate this cake in my own kitchen.
This dessert was created by Jumanah Malallah and Ahmed AlZamel, and it’s no surprise it’s gone viral. You may have also heard it referred to as the “Ahmed AlZamel Cake” (كيكة احمد الزامل) or the “Lazy Cake“. Either way, it’s got everything: a thin, moist chocolate cake, a creamy, dreamy filling, silky chocolate ganache, and a crunchy, chocolatey cereal topping. Seriously, it’s everything you could want in a cake, and I just had to try making it and this is my take on it!
Ready to recreate this viral Krunchoco Cake? Let’s do it!

What You’ll Need for the Cake:
- 1 Box of chocolate cake mix, plus ingredients according to box (this will make two thin 9×13 cakes, or you can bake in a larger sheet pan for 1 large thin base). For this recipe, I used chocolate cake mix – because it’s quick, easy and convenient! Oh, and it’s delicious. But if you’re in the mood to get fancy, feel free to make your own from scratch!
- Milk or chocolate milk – for soaking the cake
The Cream Layer
- 12 oz. cream cheese, softened
- 1 1/2 cup sweetened condensed milk
- 3 cups heavy cream
- 2 packet of Dream Whip (2.5 grams each)
- 2 teaspoon vanilla (optional)
The Chocolate Ganache:
- 3 cups milk chocolate chips (or your choice of chocolate)
- 2 cup heavy cream
The Cereal Topping:
- 4 cups chocolate rice cereal (regular rice cereal will work fine too!)
- 1 cup melted milk chocolate
- 1 cup cocoa powder
How to Make the Viral Krunchoco Cake:
Step 1: Prepare the Cake Layer
This recipe makes 2 cakes. Start by preparing the cake mix according to the package instructions. Divide the batter evenly between two 9×13 baking pans. Since the batter is split, the bake time will be shorter than the package instructions, and will bake into thin layers. To check if the cakes are done, insert a toothpick into the center – if it comes out clean or with just a few crumbs the cakes are ready!
After baking, make sure the cakes cool completely before soaking them with milk.


NOTE: Don’t want to make 2 cakes? Bake one large cake in a 13×18 baking pan instead of two 9×13 pans. Alternatively, you can bake half the batter (and halve the recipe) and save the rest for cupcakes or another recipe!
Step 2: Make the Cream Layer
In a large bowl, whip together the softened cream cheese and sweetened condensed milk until combined. Then whisk in the heavy cream, dream whip, and vanilla. It’s easiest to use a stand mixer or hand mixer for this step. However, it’s definitely possible to whisk by hand, though it may take a bit longer to get that lightly, fluffy consistency. You will mix the cream mixture for about 3-5 minutes, or until light, smooth, and creamy!

Step 3: Prepare the Chocolate Ganache
In a saucepan, heat the heavy cream until it begins to simmer. Pour the cream over a bowl of chocolate chips. Allow to sit for 5 minutes, and then stir until smooth and glossy. Set aside to cool.


Step 4: Make the Cereal Topping
Now for texture – the cereal topping! In a sealable bag, combined the chocolate rice cereal with melted chocolate and shake the bag until the cereal is completely coated. They make clump up a bit but thats okay! Just trust the process!
Then, add the cocoa powder to the bag and shake again until every piece is covered in chocolate! If you feel that there are large chunks simply press to break clumps and shake once more to ensure each piece is coated in cocoa powder!


Step 5: Assembly
Begin by poking some holes in the cooled cake, using a tooth pick. Then pour the milk over the cake. You want it to just slightly moisten the cake, you do not want it to be soggy! Allow it to soak for about 5-10 minutes.

Then pour the layer of the cream mixture over it. The cream is the star of the show, so it will be a thicker layer! Let the cake chill in the fridge for about 1 hour.


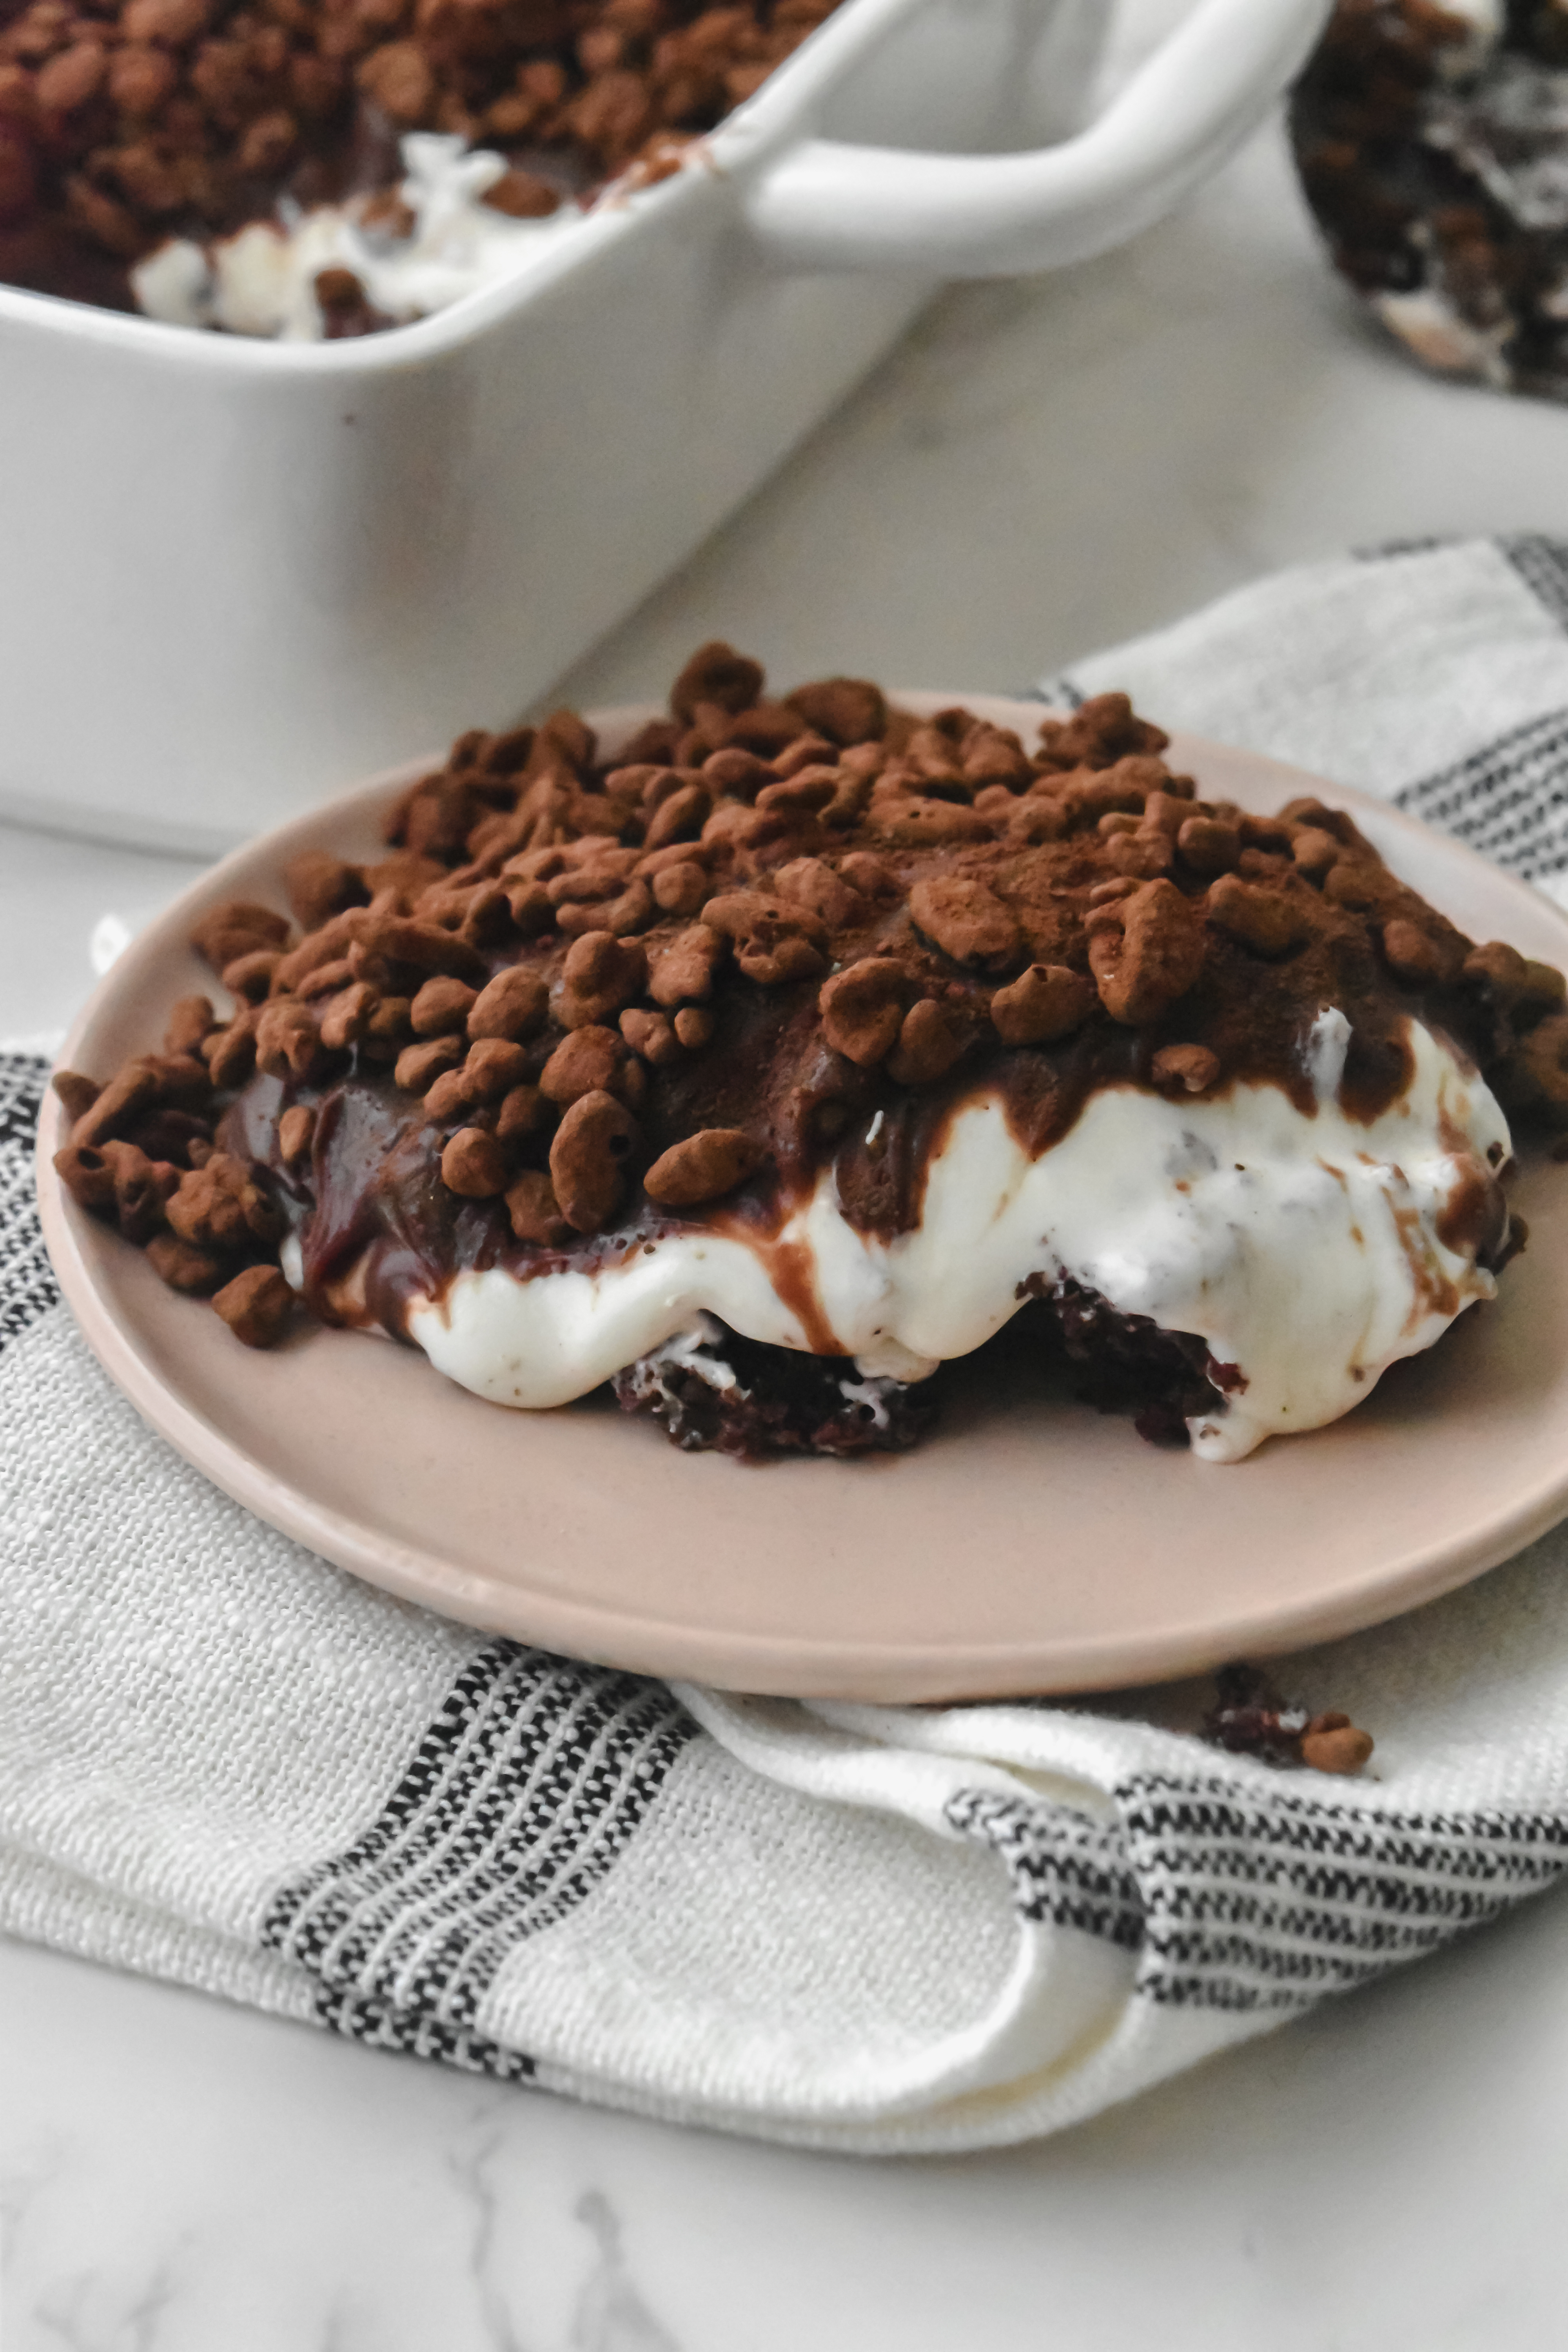
Once the cake has chilled for a bit and the cream layer is set, pour the cooled chocolate ganache over the cream layer. Then sprinkle the cereal topping all over the cake! (This step can also be done right before serving – it’s totally up to you! I like to add the cereal topping right after pouring the ganache.)


Then let the cake set and chill in the fridge for about 4-5 hours (or longer if you prefer it super cold). The layers don’t fully set, which keeps this dessert delightfully creamy and pudding-like for a luxurious, melt-in-your mouth texture!
Pro Tips for the Perfect Krunchoco Cake
- This recipe makes enough for two 9×13 pans or one large baking pan. If you prefer to bake it all in one pan, you can use a larger baking pan (about 13×18 inches). Alternatively, you can bake half the batter in a 9×13 baking pan, and save the rest for another dessert – just make sure to halve the recipe as well if you go this route!
- The cake layer is intentionally thin! This allows the cream, ganache, and cereal layer to shine!
- Let the Cake Cool Completely before Soaking!
- Chill the cake at least for 4-5 hours, but I recommend letting it chill overnight for the ultimate cold, creamy dessert!


The Krunchoco cake is labor of love, literally – but trust me, it’s worth every step. From the thin, moist cake to the smooth cream and silky ganache, every bite is an indulgent experience. This cake has hit social media by storm, and I’m so happy to have recreated this in my kitchen.
If you try my recipe (and you totally should), be sure to tag me @Sufratee on instagram or leave a comment below. I can’t wait to see your version of this deliciousness!

VIRAL Krunchoco Cake (Ahmed AlZamel Cake)
Course: DessertDifficulty: Moderate2
9×13 cakes20
minutes4-5
Hours1
hour10
minutesIndulge in the Viral Krunchoco Cake, featuring a decadent chocolate base, creamy filling, silky ganache, and a perfectly crunchy, chocolatey topping that’s impossible to resist!
Ingredients
- For the Cake
1 box Chocolate Cake Mix (13.25 oz)
1/2 cup of milk or chocolate milk
- For the Cream Layer
12 oz. cream cheese
1 1/2 cup sweetened condensed mik
3 cups heavy cream
2 2.5-grams packets of dream whip, (or any powdered whipped topping mix)
2 teaspoons vanilla (optional)
- For the Chocolate Ganache
1 1/2 cups milk chocolate chips
1 cup heavy cream
- For the Cereal Topping
1 cup milk chocolate chips, melted
4 cups crisped chocolate rice cereal (or original crisped rice cereal)
1 cup cocoa powder, for coating
Directions
- Prepare the Cake Layer
- Preheat your oven and prepare the cake mix according to the package instructions. You’ll need to bake two thin cake layers, so split the batter between two 9×13 pans (or use a large sheet pan, about 13×18 inches, for one thinner)
- Bake according to the box instructions, checking for doneness with a toothpick. Once baked, allow the cakes to cool completely.
- Soak the Cake
- After the cakes are fully cooled, lightly soak each cake with milk. Let it absorb the milk for about 10 minutes. Set aside.
- Make the Cream Layer
- In a large bowl, beat together the softened cream cheese and sweetened condensed milk till combined. Add in the heavy cream, packets dream whip, and vanilla. Beat until the mixture is light and creamy, about 3-5 minutes.
- Divide the cream mixture over both cakes, and spread evenly.
- Place it in the fridge to set for 1 hour, as you prepare the ganache and cereal topping.
- Prepare the Chocolate Ganache
- In a sauce pan, heat the heavy cream over medium heat until it begins to simmer.
- Pour the hot cream over the bowl of chocolate chips. Allow it to sit for 5 minutes.
- Then mix until smooth and glossy. Set aside to cool.
- Make the Cereal Topping
- In a large sealable bag, combine the crisped chocolate rice cereal with the melted chocolate. Seal the bag and shake it until the cereal is evenly coated in the chocolate.
- Add the cocoa powder to the bag, then seal and shake again until each piece is coated with cocoa powder. If the cereal clumps, simply break it apart by pressing on it and then shake the bag again to ensure the cereal is completely coated in cocoa powder. Set aside.
- Assemble the Cake
- Once the ganache has cooled completely, pour it over the cream layer, smoothing it out evenly.
- Then sprinkle the top the cake with the cereal mixture (or you can sprinkle the cereal mixture right before serving).
- Chill and Serve
- Once assembled, chill the cake for at least 4-5 hours or overnight for best results!
Notes
- Don’t want to make 2 cakes? Bake one large cake in a 13×18 baking pan instead of two 9×13 pans. Alternatively, you can bake half the batter (and halve the recipe) and save the rest for cupcakes or another recipe!
- Serve chilled! This cake is best served cold, so make sure to give it enough time to chill in the fridge.
Leave a Reply